Sunday, October 21, 2012

DIY Disney Autograph Book

Wanna hear something crazy?

As much as I love Disney and with as many times as I've gone......I have never gotten a single characters autograph.... EVER!

Insane right?

I only ever get pictures 

So I decided that there was no better time to start than with our upcoming trip


I found an old spiral book that was perfect for the project!  I wonder if Miss Brittany Wells recognizes it?  Actually, I don't even know if she will read this post but she is one of my few followers so maybe someday she will lol

These books are from a photo class we were both in in High School.  My name in silver was written on there by our teacher Mrs. Flaherty.....love that crazy woman!


I kept it all these years and as an art teacher I'm sure she would be happy to see it put to creative use

I cut a piece of scrapbook paper to fold over the cover nicely


And Mod Podged it on....with a coat on top as well


I had some glittery black chipboard letters leftover from a project I had just finished (coming soon) that I hot glued on 

Then I dressed it up with some ribbon, foam Mickey head stickers (leftover from the Disney Vacation Countdown project) and stars that I cut out of glitter foam

This is one of those great projects where I had everything on hand and didn't have to buy a thing.  

Winning!


Thursday, October 18, 2012

Full Body Mummy Cake

A few days ago I posted THIS mummy cake

Like I said, I made it many times but when it came time for a big Halloween party (go HERE to see the food from that party) I needed a cake that would feed alot more than that little mummy head could

Soooo....

I decided to do the full body version of it

I drew a template onto poster board and cut them into various pieces (legs, arms, torso) that I fit onto 2 sheet cakes.  I also baked a cake in a small bowl for the head

Piece it all together and frost well

Cover in your strips of fondant and add spiders


He's a cute little guy isn't he?


Wednesday, October 17, 2012

Halloween Party Food

In the spirit of Halloween I thought I would share a few themed party foods

These are from 2 years ago....back before I got more of a knack for table and food presentation and my pictures are TERRIBLE  (well...let's face it they still are lol)

So please have some leniency in your judgement! haha

First off.....

Spider Web Dip!


Just your basic 80s style 7 layer bean dip....but with a sour cream web and a fake spider

Monster Eyes


Deviled eggs with slices of large green olives for eye balls


Mold & Mildew Dip


Just Spinach Artichoke dip and bread renamed to fit the theme.  Simply renaming these things can go a long way

Witches Fingers


Homemade shortbread cookies formed to look like fingers with almond nails

Marshmallow Ghosts

Homemade marshmallows cut out with a ghost cookie cutter

Mummy Toes

These didn't photograph too well, they looked much better in person
They are little smokies that I cut squares out of for nail beds and then wrapped in crescent dough

Eerie Empanadas

 
These are potato and chorizo empanadas that I dyed the the dough some fun halloweenie colors

Shrunken Pumpkin Pies


Pumpkin pie bites made in a mini cupcake pan.  I put out a can of whipped cream with these

There were a lot of "pickies" out as you can see, but I also wanted one main dish so I made a big put of chilli along with all the toppings


With boned shaped breadsticks


So there you have it.   Sorry for the lame-o presentation and pictures but I just wanted you to get the gist of it

Tuesday, October 16, 2012

The Best Low Carb Bread....Fo Realzies!

There are lots of different variations to the low carb bread known as "Oopsies"

If you're not sure why they're called that you're in luck because I'm about to tell ya!

Apparently there was a recipe by Dr. Atkins called Revolution Rolls

This recipe called for cottage cheese but somebody misread it and used cream cheese by mistake

They realized it turned out better than the original recipe and the Oopsies were born!

Now there are a TON of different recipes to the oopsie rolls.  Differences in amounts, some use Splenda, different directions......basically A LOT of variation.

Lucky for me my sister started on the LC wagon before me and she got to do all the testing and tweaking.....and I just got to steal her recipe haha

We always joke that Atkins is her religion.  She studies it, lives it,and preaches it.  In fact I think she should be syndicated.   She could be the  Joel Osteen of carbs.  


Now let's get started....


You need


7 eggs, cream of tartar, protein powder (I use unflavored whey protein) and 8oz of cream cheese
                   *Let both the eggs and cream cheese come to room temp*

Then, separate your 6 of your eggs, leaving one to the side


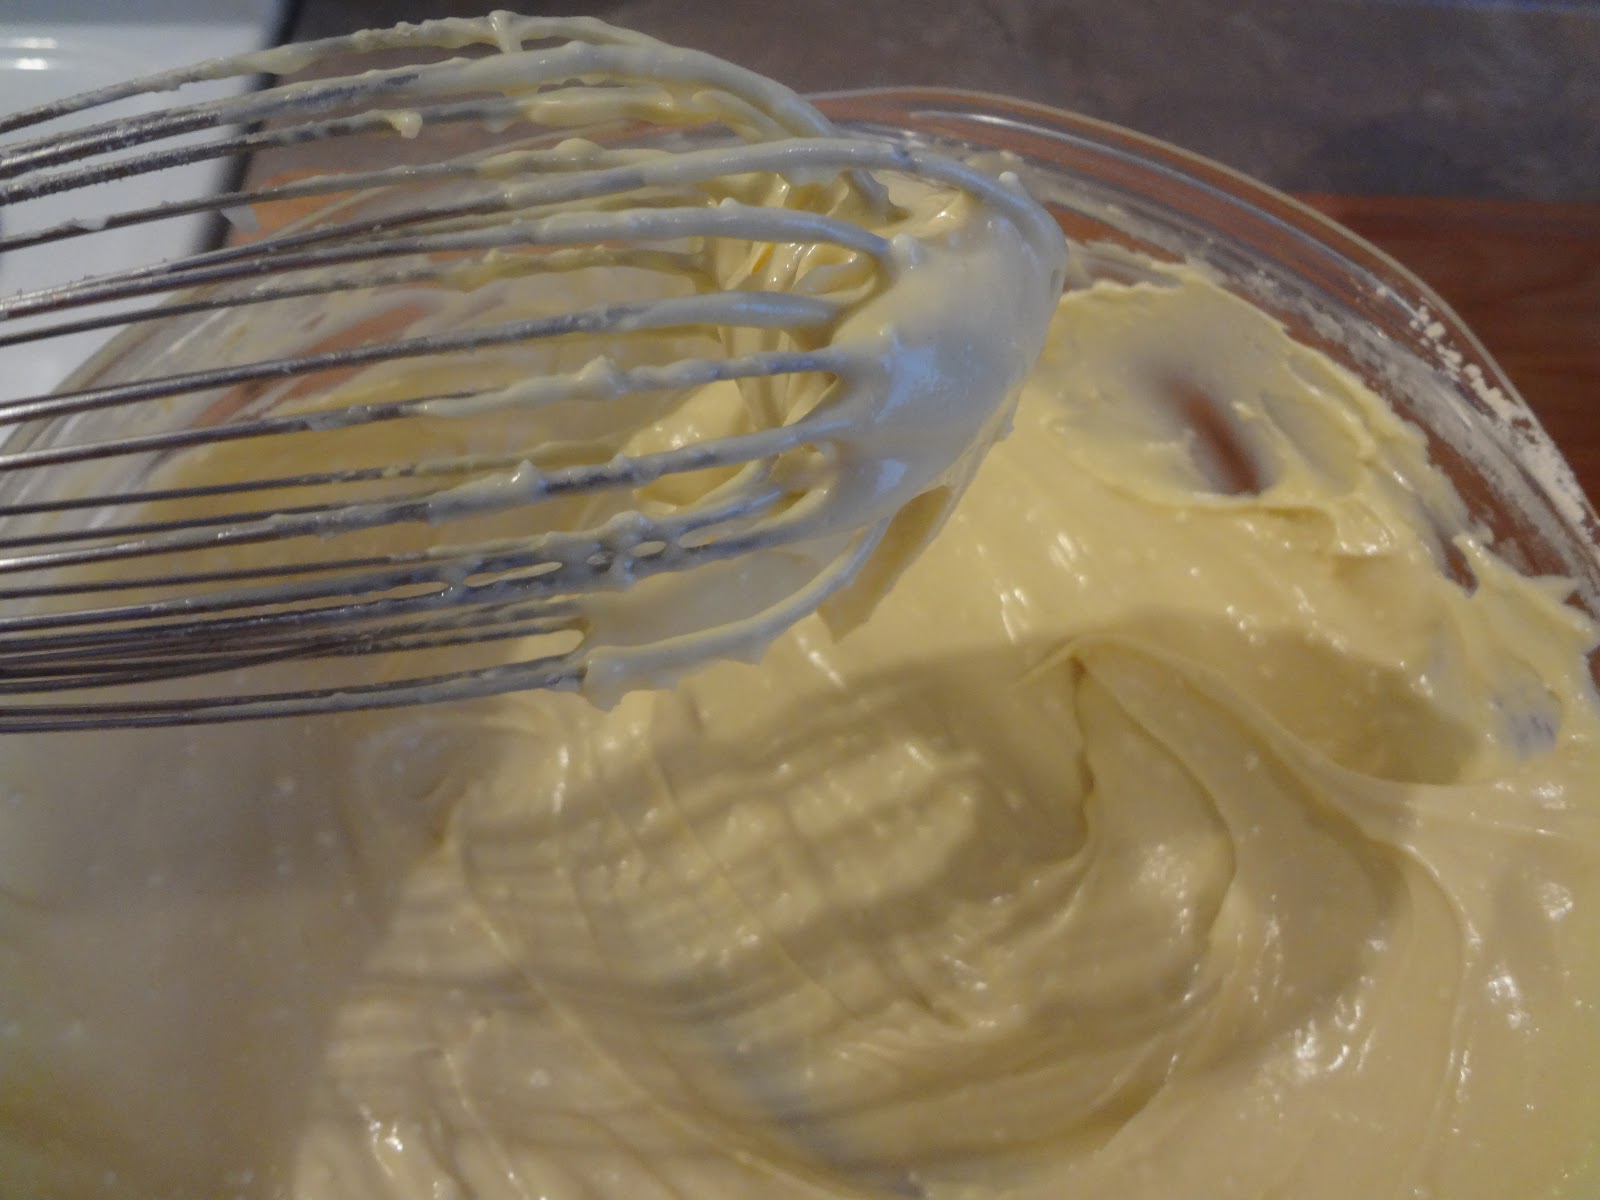
Add the extra whole egg to the yolks and whisk.  Then mix in the cream cheese.  I whisk it by hand because if you're cream cheese is soft enough it should be pretty easy.

It will look pale yellow and thick like this


Then I whisk in 1/4 cup of the protein powder

At this point it sort of looks like cake batter


Remember your egg whites?  Well whip those to stiff peaks in your mixer


You know they're right when you can turn the bowl upside down


Now dump the yolk mix onto the egg whites and fold.  It won't be mixed perfectly and you will still have patches of eggs white....but that's ok!  You don't want to overmix or you will break down and deflate the whites which will give you less yield


Then spread into sprayed (or use shortening....I was out of spray today) pans.   My sister found that these mini pie tins are the best.  Before I bought them I made them once just by dropping big spoonfuls onto sprayed parchment paper.  It worked out ok but the little pie pans give them the perfect shape and size and seem to help them hold up for a more bread like texture.  So I highly suggest buying these if LC is something you want to stick with for a while.   I've seen that some people use whoopie pie pans which should probably work well too but just be a bit smaller


This amount of batter always gives me enough for 12....no more...no less!

Be sure to smooth the tops with a spatula because they bake up exactly how they look in the pan.  So if they are lumpy on top and not spread out evenly....that's how the will be. They don't spread at all

Bake in a 300 degree oven for 30 minutes


They should pop out easily with a knife or spatula

Let them cool completely


Aren't they cute?  They look like Aunt Hatties brand hamburger buns to me!

And if you ever need bigger ones you can bake them in 5 in cake pans and just bake a bit longer.  My sister does this for her husband when he goes out to restaurants for work.  He just orders a burger without the bun and whips out his own giant Oopsies

And if you were wondering....I'm pretty sure he does get plenty of shit for it.  But he's a pretty secure guy ;)

Anyways...

Store them in an airtight container or ziplock bag in the fridge.   I learned that the hard way

It may not be so bad in other places, but here in hotter than Hades Az, they get funkadelic reeeaaaalll quick on the counter

I bit into one and it was yeasty and moist after a day.....not a pleasant experience (shudders)

Here's one I used for my hamburger I ate for dinner tonight


I paired it with some dill "fauxtatoe salad"  (using cauliflower)  I normally don't make my salad with dill but the dollar store had big bags of it so I thought I'd branch out a little


Monday, October 15, 2012

Skull Halloween Wreath

So I sort of dropped the ball at the end of Halloween wreath week.  I got super busy again.

Go figure!

The only one I didn't get around to posting was the one we ended up keeping.

I had made some many different wreaths and each time I got done with one I declared it my favorite.....

Until I made the next one

So I gave The Boy the task of picking one and this is what he chose


 This is just a variation of my SKULLS & SPIDERS WREATH

if you go there you can see how I did the skull


I think he made a good choice!

Mummy Cake

I first made this mummy cake for a Halloween party at my sisters 4 years ago

and I've made it many many times since

It was one of my most requested cake designs ever


It's super easy to make yourself too!

All you have to do is bake your cake mix in an oven safe bowl in whatever size you want.  Mine was either 8 or 9 inches

Then just frost the entire cake except leave some of the cake bare on top  for where you're going to place the eyes.

Cut strips of white fondant (I always made my own out of marshmallows)  and place all over the cake, pressing it into the frosting a bit.

Make your eyes and place over the area you left plain, securing with frosting.

Add a spider on top of the head for a touch of fun


And that's it!  Perfect for a kids party

Sunday, October 7, 2012

Black & Purple Spiders Wreath

Are you sick of wreaths yet?

I don't blame you if you are

So I'm going to keep this short and sweet and just show you the picture


Saturday, October 6, 2012

Spiders & Web Wreath

For this one I used some wood letters again that I painted

The green crinkle paper

An assortment of glittery spiders

And a glittery black web hangy thing from the dollar store

It had a black widow with that red hour glass bow tie looking thing  (which I don't understand but I know means something...I should probably look that up haha)

I wasn't crazy about the spider so I glued it to the side a little to cover most of it and then put one of my spiders over the remaining part that showed

 I like that the web isn't dead center because of that


I also added some black roses because it felt spidery to me


Wednesday, October 3, 2012

Skulls & Spiders Wreath

Next stop on the tour of Halloween wreaths.....skulls!


I got these cool skulls at dollar tree

Spray painted it gray


Then gave it a few coats of glittery silver acrylic paint

It's amazing what paint can do huh?

My background is a mix of purple and black crinkle paper

And then glued on some spiders and decorative foam glitter balls


Still kinda cutesy but slightly more spooky.  I like it!

<a href="http://thecsiproject.com"><img class="aligncenter" src="http://thecsiproject.com/wp-content/uploads/2010/07/thecsiproject.com-logo-300.png" alt="Visit thecsiproject.com"></a>

Bat Wreath

I wanted to make at least one wreath that was classic orange and black 

But of course it needed glitter

So thus both glittery bats from the dollar store and a black glitter bow was used

I just cut the bow a little so it wasn't as long

Then just added some wood letters I painted black


I swear the  bow is straight   I just hung it all wonky

Tuesday, October 2, 2012

Spiders and Bows Halloween Wreath

On this episode of

Halloween Wreath Week


Ok so it totally looks blueish in the pictures

But this wreath is purple and green

Bible
(in my best Kardashian voice)

Glitter balls....glitter spiders.....glitter bow


It's sparkly

Or as my niece Katie used to say when she was little

"Spaw-co-leeeee"

My families ability to talk normal has been forever changed

We have our own language and dialect now


Oh and the background filler stuff is a mix of purple and black


Monday, October 1, 2012

Candy Corn Wreath

Geeez!  Another long stretch without blogging


I've been a busy broad!

(see...see what I did there?)

Again this whole "job thang" is just cramping my blogging style

I wish I could just stay home all day and craft and blog my little heart out

But me and the husband have a lifestyle we have to maintain

We like to eat

Oh and we like having shelter too

We're weird like that


It wasn't just work that's kept me busy.....I've been a Halloween wreath making fool!

My entire living room is covered in wreaths (and glitter..sorry hubs!)

For realz

But that means I present to you......

Halloween Wreath Week

over here at The Busy Broad

Makes me feel like a legit blogger

Even though I'm pathetically far from legit

But all the cool bloggers have enough "like" material to fill up an entire themed week

So the fact that I do now too make me feel like one of the cool kids 


First wreath up is the Candy Corn Wreath

All my wreath starts off pretty much the same because I'm a creature of habit  

if you go HERE  you can see detailed instruction

But you're a smart cookie and I'm pretty sure you can figure out how hot gluing works


Made the big corn out of foam

And the little ones are wood that I painted and then covered in a lightly glittery paint but it doesn't show up in the picture well

That's it!

Stay tuned for more Halloween Wreaths

The biggest issue was deciding which one to keep for ourselves